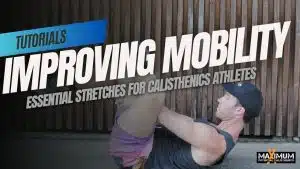
If you’ve been following my blog or YouTube channel, you will have noticed that I’ve been working on the one arm handstand quite a bit recently. I’ve been practising handstands for a couple of years now and have learnt a lot in that time, I’ve also taught a few of the guys in my training sessions how to do this cool move and was lucky enough to be demonstrated the technique at the PCC in Melbourne.
I still have a lot to learn with handstands and the one arm variation, the following is a tutorial covering all that I have learnt over the last 2 years from practising myself and teaching others. I welcome any feedback or questions on the tutorial so please feel free to contact me through my Google+ account or in the comments section below.
In the true spirit of progressive calisthenics, I will work through some prerequisites to attempting the one arm handstand before going into a bit of detail on the technique.
Shoulder Mobility
I’m just starting to brush the surface with my knowledge of shoulder mobility but it’s an area that I am working hard on and feel it has a very important role to play in handstands. My thanks goes to Benji Williford and Max Shank for allowing me to use their videos on this post.
Whilst standing, raise your arms above your head as if you were doing a handstand. If this feels uncomfortable and you are not able to hold this for 30 seconds to a minute, then you should work on your shoulder mobility before attempting a handstand.
Pike Handstands
If you’re already able to hold a handstand then feel free to skip over this section. The pike handstand is an excellent progression exercise to get your muscles ready for the full handstand. Elevate your feet on a sturdy object, place your hands on the ground, shoulder width apart and your hips approximately at a right angle. Your arms should be straight and pushing yourself away from the ground.
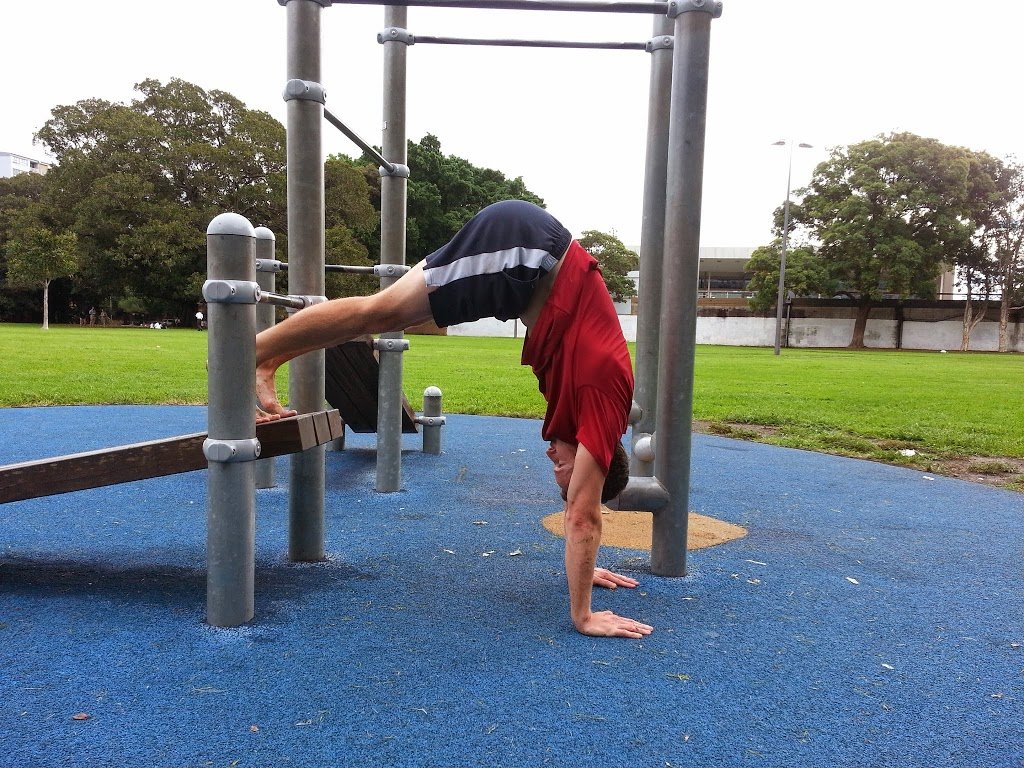
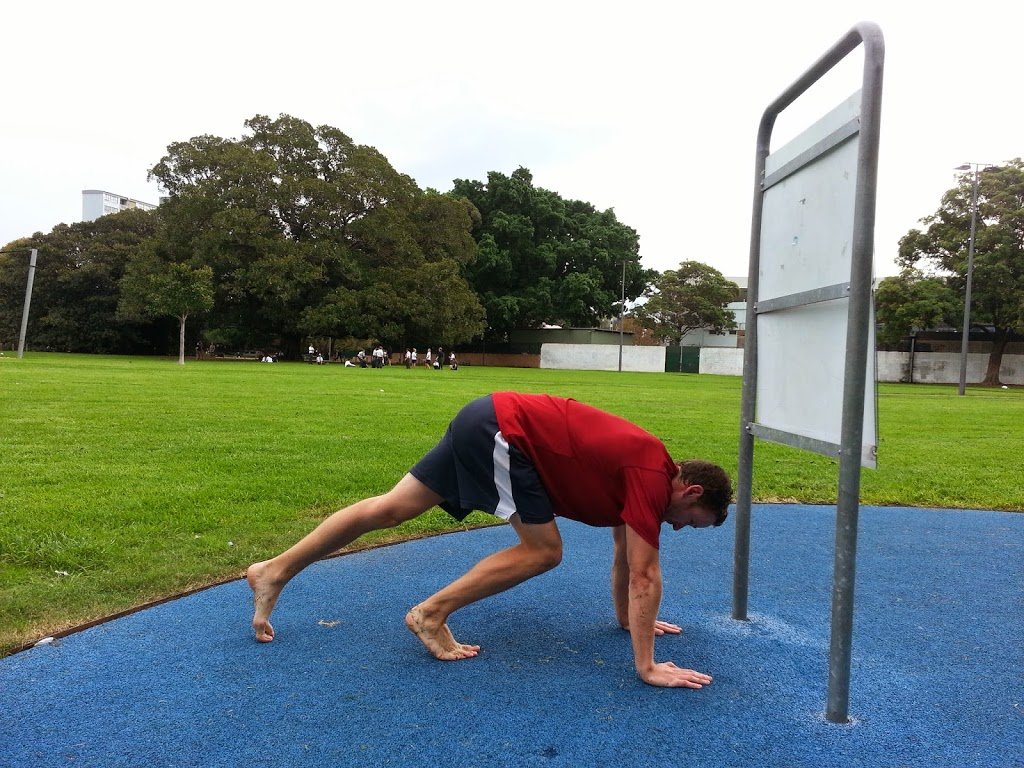
Once you can hold this position for at least one set of a minute then make it more difficult by either moving your feet to a higher object or putting one foot in the air to increase the load through your arms.

Once you feel like you have got all you can out of this exercise (one minute hold should be enough), then it’s time to move onto the full handstand.
Kicking Up
Probably one of the most difficult parts of performing a handstand for the first time is kicking up into it. This is very much a confidence thing as being upside down can be such an alien move if it’s not something you’re used to. Once you’ve successfully performed it a few times you’ll start to feel a lot more comfortable with it.
There’s 2 common approaches to this, the first is to start from a standing position, whilst the second is to place your hands in position first then kick up from there. There’s no right answer here, you just have to go with whichever you feel most comfortable with. Doing it from a standing position can give you more power to get up but maybe a little more daunting than from a floor position. I personally place my hands before kicking up as seen below, this allows me to ensure I get my hands where I want them before attempting the kick.
Before kicking up, ensure that your hands are in the correct position, I personally like to be about half a foot to a foot away from the wall. Your arms should be completely straight and ready to take your weight so keep them pushing into the ground.
From here, push off with your forward foot and lift your other leg towards the wall before following it with your front foot. It’s better to start off with too little power than too much and simply add more until you reach the wall. This may take several attempts the first time.
Once you can hold a handstand for at least one set of a minute then you should be ready to start progressing towards the one arm variant.
One Arm Handstand
Remember, just like the full handstand, it’s important to have your working arm fully extended and pushing yourself away from the ground, this will provide the most strength to keep yourself up.
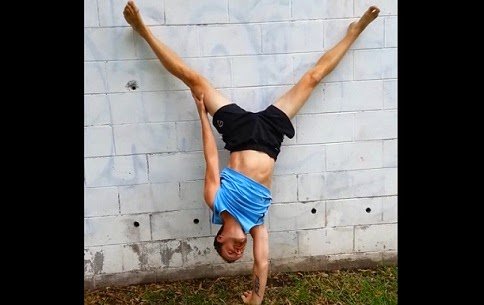
The first stage of performing the one arm handstand is to straddle your legs and start shifting your weight over to your working arm.
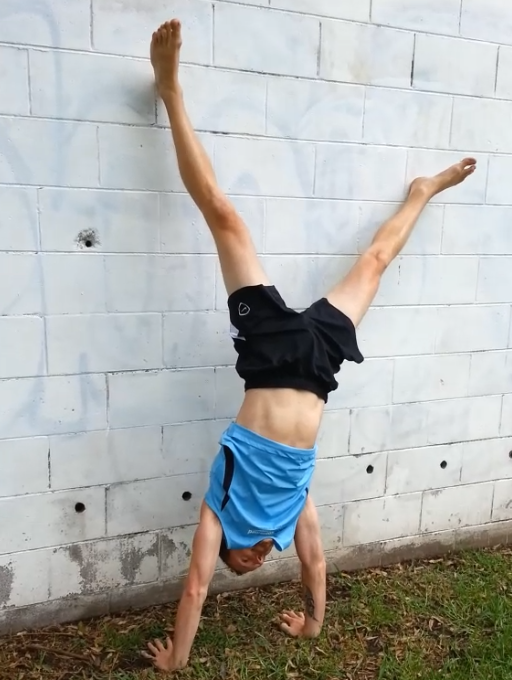
In the picture above you can see that I have shifted a little more of my weight towards the right arm. As with the full handstand, get comfortable holding this position before attempting the next one, gradually shifting more weight to your working arm.
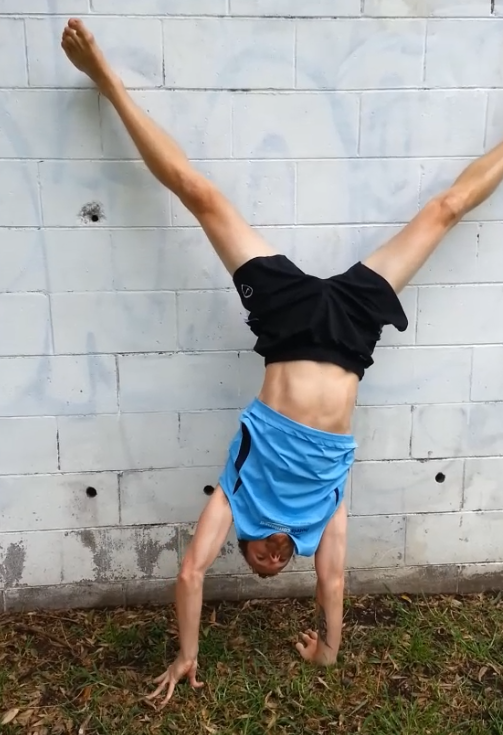
The next stage is to go up onto your fingertips with your non-working arm, this will start to put a lot more weight onto your working arm. If this feels okay then start experimenting with quickly lifting your arm up off the floor but only a little at first so that you can easily put it back down if you start to lose your balance or strength. This is the stage I was at when I shot this video in New Zealand a few weeks ago.
Here is my latest one arm handstand, whilst it is the longest I’ve stayed up on my stronger arm, it is probably not the best form I’ve done as my legs were not quite in the correct position, which is why I struggled to get my arm up at first and didn’t manage to do so with my left arm.
Whilst I’m attempting my left arm, you may hear Tim telling me that my right leg needs to be straighter up. It’s quite difficult to tell when you’re upside down but looking at the video, he’s spot on, if I’d moved my right leg a few inches to the left I probably would have been able to get up onto my left arm. Furthermore, I can see that my left arm was maybe an inch too far to the left of where it should have been and not directly under my shoulders, thus losing some strength there. This is probably because I attempted to do my left without getting down and ‘resetting’ my arm position, which is something that I would normally do. I recommend that you do this at first whilst you are getting used to the move.
The leg position itself requires practise, and the perfect position for you may be slightly different to someone else. As a general guideline, you’re looking for your opposite leg to your working arm to be closer to your body than the other. It may help to get someone to guide when first attempting this. I’ll continue practising this until I can hold it for a minute both sides, beyond that I will probably start shifting more of my focus towards free-standing handstands. A distant future goal that I have is to be able to this without the wall, that will require years of hard work I imagine.
Hopefully this tutorial will have been of use, as I learn more I may come back and update it. If anyone manages to get their first one arm handstand after reading this then please send a video or let me know through the comments section below.