Calisthenics is a training method that uses your own bodyweight as resistance to build strength and muscle.
It requires little to no equipment and can be performed almost anywhere, making it a convenient and effective way to stay in shape.
Rather than adding weight to increase the difficulty of an exercise, we simply adjust the exercise.
This article lists 20 calisthenics moves for you to master, starting out with some of the easier moves, and progressing to advanced feats of bodyweight strength.
We have developed a system to give you a better idea of how difficult it is to achieve a particular exercise.
Some will be easier for some people and harder for others, so this is based on how long it would take the average deconditioned adult to achieve.
Since calisthenics requires not just strength but also mobility and skill/body awareness, we have given a rating for all of these.
Bronze – This level is obtainable for most people with a decent amount of consistent training;, the more stars, the more effort it will take.
Silver – This level requires dedication and is not going to happen overnight; for some, these exercises may require years of dedicated training
Gold – These are the Crème de la crème of calisthenics and can take a lifetime of training to master
1. Push-up
This classic exercise targets the chest, shoulders, and triceps.
To perform a push-up, start in a plank position with your hands shoulder-width apart and your feet together.
Keep your core engaged and maintain a straight back throughout the exercise.
Lower your body towards the ground by bending your elbows and aiming to touch your chest to the ground.
Keep your elbows close to your sides and avoid flaring them out.
Push through your hands to return to the starting position, extending your arms and returning to a high plank position.
How to Progress to a Push-up
The simplest way to unlock a push-up is to start by placing your hands on an elevated surface at a height where you can manage 3–5 reps comfortably.
Perform 5 sets of 3–5 reps, resting 2–3 minutes between sets.
Once you’re consistently hitting 5×5, lower your hand elevation and repeat.
For detailed tips and form advice, check out our in-depth push-up guide.
2. Pull-up
Pull-ups are a great exercise for building upper body strength, particularly in the lats and biceps.
To perform a pull-up, hang from a pull-up bar with your hands shoulder-width apart and your palms facing away from you.
Keep your legs straight and in front of your body, engage your scapula by retracting and depressing them, this will help activate your lats.
Pull your body up towards the bar, keeping your elbows close to your sides and your shoulders back.
Avoid kipping or swinging your body.
Lower your body back down to the starting position with control.
How to Progress to a Pull-up
Start with assisted pull-ups (band, machine etc), choosing a difficulty where you can complete 3–5 reps per set.
Complete 5 sets of 3–5 reps, resting 2–3 minutes between sets.
Once you’re able to consistently hit 5×5, progress to a more challenging variation or reduce assistance.
For technique tips and detailed instructions, see our complete pull-up guide.
3. Lache
A lache is a calisthenics move that involves jumping from one bar to another, combining elements of a pull-up and a swing.
To perform a lache, start by hanging from a bar with your hands slightly wider than shoulder-width apart.
Swing your legs forward and jump to grab another bar; keep your eyes focused on the bar you are trying to reach.
Try to catch the bar with a slight bend in the elbows to protect your shoulders and take some of the force.
How to Learn the Lache
Start with a controlled swing on a bar, focusing on building momentum and grip strength.
Aim for consistent swings, increasing amplitude gradually.
Practise releasing briefly, then regripping the same bar.
Once confident, attempt short gaps between bars, progressively increasing distance.
We’ll have a detailed lache guide available soon!
4. Pull-over
The pull-over is a calisthenics exercise that primarily targets the lats, and the back muscles, but also engages the core and biceps.
To perform a pull-over, start by hanging from a pull-up bar with your hands slightly wider than shoulder-width apart.
Bring your legs up in front of you and over the bar, pulling your chest towards the bar using your lats. As your legs pass the bar, use the momentum to pull yourself up and spin over the top of the bar, finishing at the top of a dip position.
Lower your body back to the starting position with control.
Make sure to use your lats to pull your body over the bar and avoid swinging or kipping.
How to Learn the Pull-over
Begin by practising hanging knee raises, progressing to toes-to-bar to develop core and lat strength.
Progress to assisted pull-overs, using momentum from your legs and hips to rotate your torso over the bar.
Gradually reduce momentum as your technique and strength improve, focusing on controlled movements.
We’ll have a detailed pull-over guide coming soon!
5. Pistol Squat
The pistol squat is a challenging single-leg exercise that targets the lower body, particularly the quadriceps, and glutes.
To perform a pistol squat, start standing on one leg with your other leg extended out in front of you.
Lower your body towards the ground by bending your standing knee and extending your non-supporting leg in front of you.
Push through your heel to return to the starting position.
Keep your chest up and your core engaged throughout the exercise.
Maintaining good form and control is important to avoid overcompensating with your other leg or using momentum to complete the movement.
How to Progress to a Pistol Squat
Begin by performing single-leg squats to a bench at a height that allows you to manage 3–5 controlled reps per leg.
Aim for 5 sets of 3–5 reps each leg, resting 2–3 minutes between sets.
Once you can consistently perform 5×5, reduce the bench height progressively.
For more in-depth tips and techniques, see our comprehensive pistol squat guide.
6. Muscle-up
The muscle-up is a calisthenics exercise that primarily targets the lats, but also engages the chest, shoulders, and triceps.
To perform a muscle-up, start by hanging from a pull-up bar with your hands shoulder-width apart.
Pull your body up and around the bar, using the momentum to help you transition to a dip position.
As you improve your strength and skill, aim to remove all momentum and complete the movement using only your upper body strength.
Lower your body back to the hanging position with control.
How to Learn the Muscle-up
Start by mastering chest-to-bar pull-ups, ensuring you can pull explosively and touch the bar with your chest.
Next, practise jump-assisted muscle-ups, progressively increasing the bar height to challenge the transition.
Gradually reduce assistance until you can smoothly perform the full muscle-up.
A comprehensive muscle-up guide will be available soon!
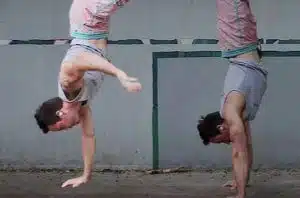
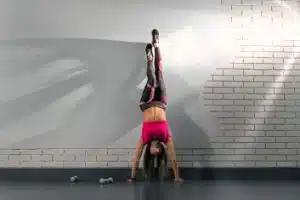
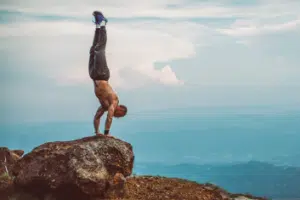
7. Handstand
The freestanding handstand is an exercise that targets the shoulders, arms, and core.
This is a challenging exercise that requires a good level of upper body and core strength, as well as balance and coordination.
It’s important to have a good understanding of how to bail out of a handstand safely before attempting, and it’s a skill that takes a lot of practice.
How to Learn the Handstand
Begin by practising wall-supported handstands to build strength, balance, and confidence upside-down.
Start by facing the wall, maintaining straight arms, strong shoulders, and an engaged core.
Gradually practise moving your feet slightly away from the wall to develop balance, eventually progressing to freestanding handstands.
A detailed handstand guide will be coming soon!
8. L-Sit
Sit on the ground or parallel bars, hands positioned beside your hips.
Engage your core and press down through your hands to lift your body off the surface, keeping your legs straight and parallel to the ground, forming an “L” shape.
Hold for as long as you can maintain form, then lower with control. Parallel bars typically make this easier due to increased hand height.
How to Progress to an L-Sit
Start by practising the N-Sit (tucked knees), making the hold easier.
Aim for multiple sets of 10–15 seconds in the N-Sit.
Gradually extend one leg at a time until you can comfortably hold the full L-Sit position.
A detailed L-Sit progression guide will be available soon!
9. Back Lever
Hang from a bar with hands slightly wider than shoulder-width.
Lift your knees toward your chest and rotate your body backwards under the bar until inverted.
From here, slowly extend your legs, lowering your body until parallel to the ground.
Keep your core engaged and maintain a straight bodyline. Hold for as long as possible while keeping good form.
The back lever builds strength in your back, shoulders, and core, demanding significant control and flexibility.
How to Progress to a Back Lever
Start with a tucked back lever (knees close to your chest) to build foundational strength.
Hold multiple sets of 10–15 seconds.
Progress to an advanced tuck (hips and knees at roughly 90 degrees).
Move on to a straddle position, gradually extending your legs until you reach a full back lever.
A detailed back lever progression guide will be coming soon!
10. One Arm Push-up
Start in a push-up position, legs wider apart, with one hand beneath your shoulder and the other behind your back.
Engage your core, lower your body by bending your arm, keeping your hips level.
Push back up to the start position. Wider feet make this easier.
This move requires strong chest, triceps, shoulders, and core.
How to Progress to a One Arm Push-up
Begin practising incline one-arm push-ups, placing your hand on an elevated surface.
Complete 3–5 reps per arm for 5 sets, resting 2–3 mins between sets.
Gradually reduce elevation height once you consistently hit 5×5.
Focus on maintaining stable hips and engaged core.
A detailed one-arm push-up guide is coming soon!
11. Bodyweight Quad Extension (Head to Floor)
The bodyweight quad extension is an exercise that targets the quadriceps muscles.
To perform a bodyweight quad extension with full range of motion, begin by kneeling down on the ground with your hip-width apart and a straight line from your hips to your shoulders.
Bend you knees and lean back until the back of your head touches the ground, keeping your core engaged.
Lift your body back up to the starting position by contracting your quadriceps, maintaining a straight line from your knees, through the hips to your shoulders.
This exercise is a challenging one that requires a good level of quadriceps and core strength, as well as flexibility.
How to Progress to a Head to Floor Bodyweight Quad Extension
Start in a tall kneeling position facing away from a wall, with your heels a short distance in front of it.
Lean back until the back of your head lightly touches the wall, keeping your hips extended and your body straight.
Perform 3–5 controlled reps for 5 sets, resting 2–3 minutes between sets.
As you get stronger, gradually move your knees further from the wall to increase the range and build deeper quad strength.
A detailed calisthenics quads training guide will be available soon!
12. Straight Arm, Straight Leg Bridge
The straight arm, straight leg bridge is an advanced calisthenics exercise requiring excellent flexibility of the delts, lats, spine and hip flexors.
To perform this exercise, start by lying on your back with your knees bent and your feet flat on the ground.
Place your hands on the ground beside your head with your fingers pointing towards your shoulders.
Push your hips and chest up towards the ceiling by contracting your glutes and triceps while pushing through your hands and feet to bring your head off the ground.
As you reach the top position of the bridge, straighten your arms and legs, leaning your shoulders over your hands and extending your legs.
Hold this position for as long as you can maintain good form. Slowly lower back down to the starting position with control.
This exercise is challenging and requires a lot of flexibility and control.
How to Progress to a Straight Arm, Straight Leg Bridge
Begin with 10–15 second holds, focusing on lifting your hips as high as your mobility allows.
Perform 3–5 sets, resting 1–2 minutes between.
As you improve, work on pushing your hips higher and opening your shoulders more with each session.
Prioritise quality over hold time—height and form are key markers of progress.
A detailed bridge progression guide will be available soon!
13. Human Flag
The human flag is an advanced calisthenics skill that targets the lateral chain—including the shoulders, lats, obliques, and grip—while demanding full-body tension and control.
To perform it, use a sturdy vertical surface like a pole or stall bars.
Place your lower hand in an underhand or neutral grip and your upper hand in an overhand grip, spaced wide apart.
Engage your entire body and use a dynamic kick or controlled press to lift your legs sideways into a horizontal position.
Keep your body as straight and rigid as possible, avoiding sagging at the hips or bending at the knees.
Hold the position briefly, then lower with control.
This movement requires exceptional shoulder stability, core strength, and grip, so it’s essential to train with progressive exercises and proper technique.
How to Progress to a Human Flag
Start by building core and shoulder strength with exercises like wall walks or flag raises on stall bars.
Practise the tucked flag hold, keeping knees close to your chest.
Progress to a one-leg flag, extending one leg while keeping the other tucked.
Move on to a straddle flag, then eventually to the full human flag with both legs extended.
For step-by-step progressions and visuals, check out our Human Flag Tutorial.
14. Front Lever
The Front Lever is an advanced calisthenics exercise that targets the back and abs.
A Front Lever involves holding your body parallel to the ground from the bar with the front of your body facing up.
To keep it strict, your shoulders, hips, knees, and ankles should be in one utterly straight line.
Hold this position for as long as you can maintain good form.
This exercise requires an exceptional level of upper body and core strength. It is a challenging exercise that takes time and practice to master, but it is a great way to build strength and improve your overall athletic ability.
How to Progress to a Front Lever
Start with a tucked front lever, keeping your knees close to your chest and your back parallel to the ground.
Aim to hold the tuck for 10–15 seconds across 3–5 sets.
Progress to an advanced tuck (hips and knees at 90°), then to a straddle front lever to reduce the lever arm.
Gradually work towards holding the full front lever with legs together and body straight.
A detailed front lever guide will be available soon!
15. Freestanding Handstand Push-up
A freestanding handstand push-up is an advanced calisthenics exercise that targets the upper body and core. It requires a high level of strength, balance, and control.
To perform a freestanding handstand push-up, start by finding a clear, open space where you feel comfortable flipping into a handstand. Place your hands on the ground, shoulder-width apart, and kick up into a handstand. Ensure you control your balance, as this exercise can be dangerous if you cannot bail out safely.
Once in the handstand position, lower your body towards the ground by bending at the elbows. Keep your body as straight as possible, minimising arching of the back. When you reach a low point where your head is close to the ground, push yourself back to the starting position by straightening your arms.
It’s important to note that this is an advanced exercise and should not be attempted until you have developed the necessary skills and strength. If you’re new to handstands, it’s best to start with wall handstands and work your way up to the freestanding version.
How to Progress to a Freestanding Handstand Push-up
Begin with wall-supported handstand push-ups, focusing on strength and control through a full range of motion.
Practise freestanding handstand holds to build balance and confidence.
Progress to partial freestanding push-ups, lowering just a few inches before pressing back up.
Gradually increase depth as strength and control improve, aiming for full range.
A detailed freestanding handstand push-up guide will be available soon!
16. 360 Swing Muscle-up
The 360 muscle-up combines a standard muscle-up with an explosive, freestyle twist—literally. At the top of the muscle-up, you launch your body into a full spin (360 degrees) before re-gripping the bar to land safely.
This move requires excellent pulling power, aerial awareness, timing, and confidence.
How to Progress to a 360 Swing Muscle-up
Begin by breaking it down into two parts:
Perfect your explosive muscle-up with height and control.
Practise bar 360s separately—jumping, spinning, and re-catching the bar—using safety mats or spotting where needed.
Once both components are solid, combine them into one explosive movement.
A detailed 360 muscle-up tutorial will be available soon!
17. One Arm Pull-up
The ultimate test of pull-up strength, the one-arm pull-up involves pulling your chin over the bar from a dead hang using just one arm.
It’s typically easier with an underhand grip (chin-up) and more difficult with an overhand grip (pull-up).
How to Progress to a One Arm Pull-up
There are two main approaches:
Follow a series of progressions—from assisted one-arm hangs to archer pull-ups and one-arm negatives.
Alternatively, build up your weighted pull-ups until you can pull with an additional 90–100% of your bodyweight.
A detailed one-arm pull-up tutorial will be available soon!
18. Planche
The planche is one of the most iconic and demanding calisthenics skills, showcasing exceptional shoulder, core, and wrist strength. It involves holding a push-up-like position with your body parallel to the ground, arms straight, and feet lifted completely off the floor.
Achieving a planche requires a significant forward lean to counterbalance your bodyweight and a high level of full-body tension, especially through the shoulders, abs, glutes, and wrists.
How to Progress to a Planche
To unlock this move, follow a structured series of progressions that gradually shift more weight into your shoulders:
Begin with planche leans to build awareness and strengthen the wrists and anterior chain.
Progress to tuck planche holds, then to advanced tuck, straddle, and eventually the full planche.
Consistency, joint preparation, and control are key—progress slowly to avoid injury.
Check out our Straddle Planche Tutorial for step-by-step guidance.
19. Victorian
The Victorian is similar to the Front Lever, in that your body should be completely straight, facing up towards the sky. However, instead of your arms hanging down from the bar, they should be almost horizontal, holding you very close to the bar.
The strict Victorian should have arms completely straight, but this level of strength is usually only seen in the upper level of gymnastics. Most casual practitioners who reach this level will still have a slight bend in the arm, decreasing the strength required.
20. Iron Cross
This exercise is performed on gymnastics rings and is probably one of the hardest moves that an amateur calisthenics athlete might hope to achieve.
It involved, holding your full bodyweight with your arms out straight to the wide, in a cross like shape.
As with the Victorian, most casual practitioners who reach this level are more likely to have a slight bend in the arm.
To reach the pinnacle of upper body strength, it should be performed with completely straight arms.